

A toilet flange is a crucial component that connects your toilet to the floor and the drainpipe. Over time, it can wear out, crack, or become loose, leading to leaks and instability. Knowing how to repair a toilet flange can save you from costly repairs and water damage. In this guide, we’ll walk you through the steps to repair a toilet flange, ensuring your toilet is securely fixed and leak-free.
Understanding the Toilet Flange
Before diving into the repair process, it’s important to understand what a toilet flange is and its role. The toilet flange is a pipe fitting that secures the toilet to the floor and connects it to the drainpipe. It ensures that waste flows smoothly from the toilet into the sewage system. A damaged or broken flange can cause leaks, wobbling, and unpleasant odors.
Signs of a Damaged Toilet Flange
Identifying a damaged toilet flange early can prevent more serious issues. Here are some common signs to look out for:
- Water Leaks: If you notice water pooling around the base of your toilet, it could indicate a flange problem.
- Wobbly Toilet: A loose or unstable toilet often points to a broken flange.
- Bad Odors: Unpleasant smells around the toilet base may be due to a damaged flange allowing sewer gases to escape.
- Visible Cracks: Inspect the flange for any visible cracks or breaks.
Tools and Materials Needed
To repair a toilet flange, you’ll need the following tools and materials:
- Adjustable wrench
- Screwdriver
- Putty knife
- Replacement toilet flange
- Flange repair kit (if applicable)
- Wax ring
- Plumber’s tape
- Safety gloves
- Cleaning supplies
Step-by-Step Guide to Repair a Toilet Flange
Step 1: Turn Off the Water Supply
The first step in how to repair a toilet flange is to turn off the water supply to the toilet. Locate the shut-off valve behind the toilet and turn it clockwise to stop the flow of water. Flush the toilet to empty the tank and bowl, and use a sponge to remove any remaining water.
Step 2: Remove the Toilet
Next, disconnect the water supply line from the toilet tank using an adjustable wrench. Unscrew the bolts securing the toilet to the floor and carefully lift the toilet off the flange. Place the toilet on a towel or cardboard to protect your flooring.
Step 3: Inspect the Flange
With the toilet removed, inspect the flange for any damage. Look for cracks, breaks, or signs of corrosion. If the flange is severely damaged, you’ll need to replace it entirely. If it’s only slightly damaged, a flange repair kit may suffice.
Step 4: Remove the Damaged Flange
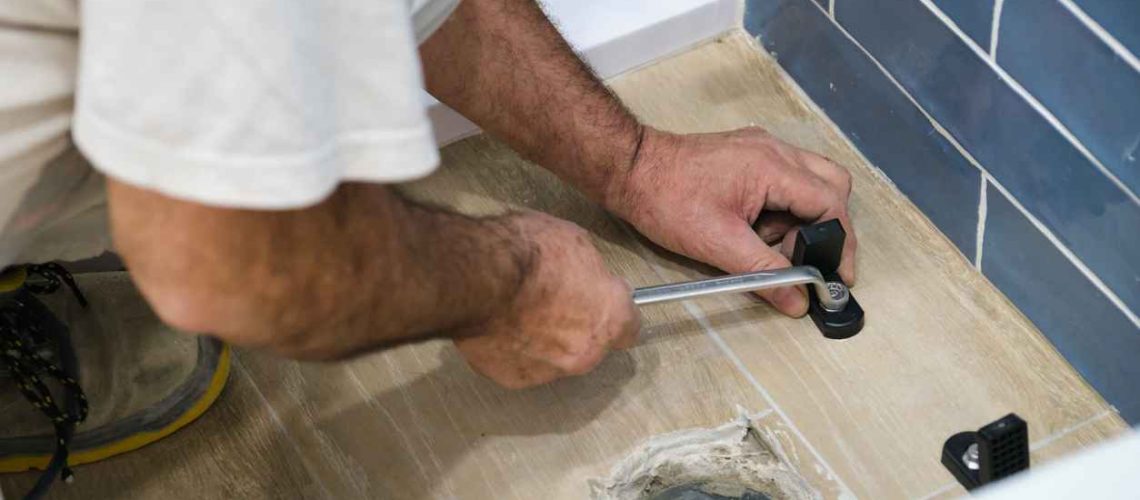
If you’re replacing the entire flange, use a screwdriver to remove the screws securing it to the floor. Carefully pry the flange off the drainpipe using a putty knife. Clean the area around the drainpipe to ensure a smooth installation for the new flange.
Step 5: Install the New Flange
Position the replacement flange over the drainpipe, ensuring it’s level with the floor. Secure it with screws, making sure it’s tightly fastened. Apply plumber’s tape to the threads of the drainpipe for a secure connection.
Step 6: Replace the Wax Ring
Place a new wax ring on the bottom of the toilet bowl outlet. The wax ring creates a watertight seal between the toilet and the flange, preventing leaks.
Step 7: Reinstall the Toilet
Carefully lift the toilet and align it with the new flange. Lower the toilet onto the flange, ensuring the bolts pass through the holes in the base. Press down firmly to compress the wax ring and create a seal. Tighten the bolts to secure the toilet to the floor, but be careful not to overtighten and crack the porcelain.
Step 8: Reconnect the Water Supply
Reconnect the water supply line to the toilet tank and turn the shut-off valve counterclockwise to restore the water flow. Flush the toilet several times to check for leaks and ensure everything is working properly.
Toilet Repair Services in Maryland
Repairing a toilet flange may seem like a daunting task, but with the right tools and guidance, it’s a manageable DIY project. By following these steps on how to repair a toilet flange, you can ensure your toilet is stable, leak-free, and functioning correctly.
However, if you encounter any issues or prefer professional assistance, don’t hesitate to contact W.L. Staton Plumbing, Heating & Cooling for all your toilet repair needs. Our experienced technicians are ready to provide reliable and efficient service in Central Maryland. Contact us today!